Onboarding Commands
The Onboarding Commands mode allows your application to manage the beginning and end the Onboarding process, as well as the capture and upload of the different documents to the API. This case is indicated for an expert level of configuration, allowing you to split the onboarding process into different stages and add other tasks related to your customer flow (e.g. a form to be filled in by the user).
You can configure and run specific actions with the class
OnboardingCommands. This mode allows you to use the following
commands:
- Add selfie: Presents a Selfie Capturer and uploads the video to Alice Onboarding.
- Get supported documents: Returns a map with information about supported documents in Alice Onboarding.
- Create document: Creates a document (
DocumentType,DocumentIssuingCountry). It returns aDocumentId. - Add document: Adds a document side. It requires as input a valid
DocumentId,DocumentSide,DocumentTypeandDocumentIssuingCountry. - Add document NFC: Adds a document's NFC chip. It requires as
input a valid and previously scanned
DocumentId. - Add other trusted document: Adds another trusted document (e.g. proof of address, bill...) from camera or PDF file.
- Get user status: Returns information about the User.
- Authenticate: Presents a Selfie Capturer and verifies the identity of the enrolled user. User must be authorized to use this command.
First, you have to configure an OnboardingCommands instance:
let onboardingCommands = OnboardingCommands(self, userToken: userToken) { result in
        // It is necessary to review the result of the initialization
        switch result {
        case .success(_):
            //OnboardingCommands is ready to use
        case let .failure(error):
            //Need to retry initialization
        default:
            //Need to retry initialization
        }
    }
Considerations:
The initialization of OnboardingCommands occurs asynchronously, so it is necessary to wait for the callback and check that the loading of resources has produced a .success(), in case of receiving a .failure() it will be necessary to try another initialization.
val onboardingCommands = OnboardingCommands(this, userToken) { result ->
     // It is necessary to review the result of the initialization
         when (result) {
            is OnboardingCommandResult.Success -> {
                //OnboardingCommands is ready to use
            }
            is OnboardingCommandResult.Failure -> {
                //Need to retry initialization
            }
            else -> //Need to retry initialization
        }
}
Considerations:
The initialization of OnboardingCommands occurs asynchronously, so it is necessary to wait for the callback and check that the loading of resources has produced a .success(), in case of receiving a .failure() it will be necessary to try another initialization.
let onboardingCommands = new OnboardingCommands(userToken)
Add selfie
It presents an Alice Onboarding Selfie Capture View, sending a video directly to Alice Onboarding platform.
onboardingCommands.addSelfie { result in
    switch result {
    case .success:
        print("Added the selfie successfully to Alice Onboarding")
    case .failure(let error):
        print("Error adding the selfie (\(error))")
    case .cancel:
        print("User has cancelled the command")
    }
}
val REQUEST_CODE_ADD_FACE = 100
onboardingCommands.addSelfie(requestCode=REQUEST_CODE_ADD_FACE)

…

override fun onActivityResult(requestCode: Int, resultCode: Int, data: Intent?) {
    super.onActivityResult(requestCode, resultCode, data)
    if (requestCode == REQUEST_CODE_ADD_FACE) {
        when (val result: OnboardingCommandResult =
            data!!.getParcelableExtra("onboardingCommandResult")) {
            is OnboardingCommandResult.Success -> {
                showDialog(result.response.content)
            }
            is OnboardingCommandResult.Failure -> {
                handleOnboardingError(result.response)
            }
            is OnboardingCommandResult.Cancel -> {
                showDialog("User has canceled the command")
            }
        }
    }
}
onboardingCommands.commandAddSelfie( (result) => { // onSuccess
    console.log(result)
} , (error)  => { // onError
    console.log(error)
},  (cancel) => { //onCancel
    console.log(cancel)
})
Get supported documents
It returns the Alice Onboarding supported documents (hierarchically sorted).
onboardingCommands.getDocumentsSupported { result in
    switch result {
    case .success(let onboardingResponse):
        print("Supported Documents:\n \(onboardingResponse.content ?? "")")
    case .failure(let error):
        print("Error getting documents supported (\(error))")
    case .cancel:
        print("User has cancelled the command")
    }
}
onboardingCommands.getDocumentsSupported { result ->
    when (result) {
        is OnboardingCommandResult.Success -> {
            showDialog(result.response.content)
        }
        is OnboardingCommandResult.Failure  -> {
            showDialog(result.response.toString())
        }
    }
}
onboardingCommands.commandGetDocumentsSupported( (result) => { //onSuccess
                        console.log(result)
    } , (error) => {   //onError
                        console.log(error)
    })
Create document
It creates a document given the documentType and the issuingCountry.
let documentType = DocumentType.driverlicense
let documentIssuingCountry = "ESP"

onboardingCommands.createDocument(type: documentType,
                                issuingCountry: documentIssuingCountry) { resultCreateDocument in
    switch resultCreateDocument {
    case .success(let onboardingResponse):
        let documentId = onboardingResponse.content as? String
        print("Created a document (\(documentId)) successfully on Alice Onboarding")
    case .failure(let error):
        print("Error creating the document (\(error))")
    case .cancel:
        print("User has cancelled the command")
    }
}
onboardingCommands.createDocument(documentype, documentCountry) { result ->
    when (result) {
        is OnboardingCommandResult.Success -> {
            val documentId = result.response.content
        }
        is OnboardingCommandResult.Failure -> {
            showDialog(result.response.toString())
        }
    }
}
let documentType = DocumentType.IDCARD
let issuingCountry = "ESP"

onboardingCommands.commandCreateDocument(DocumentType.IDCARD, issuingCountry, (result) => {  //onSuccess
    console.log(result)
} , (error) => { // onError
    console.log(error)
})
Add document
It presents an Alice Onboarding Document Capture View sending images to the Alice Onboarding platform. Before starting addDocument command you have to create a document_id with the createDocument command.
let documentType = DocumentType.driverlicense
let documentIssuingCountry = "ESP"
let documentSide = DocumentSide.front

onboardingCommands.addDocument(
    documentId: documentId!,
    type: documentType,
    issuingCountry: documentIssuingCountry,
    side: documentSide) { resultAddDocument in
        switch resultAddDocument {
        case .success:
            let message = "Added a document (\(documentType) - \(documentIssuingCountry) - \(documentSide)) successfully to Alice Onboarding"
            print(message)
        case .failure(let error):
            print("Error adding the document (\(error))")
        case .cancel:
            print("User has cancelled the command")
        }
    }
}
val documentype = DocumentType.IDCARD
val documentCountry = "ESP"
val REQUEST_CODE_ADD_DOCUMENT = 300

onboardingCommands.addDocument(
documentId = "documentId",
type =  documentype,
issuingCountry = documentCountry,
side = DocumentSide.FRONT,
requestCode=REQUEST_CODE_ADD_DOCUMENT)

. . .

override fun onActivityResult(requestCode: Int, resultCode: Int, data: Intent?) {
    super.onActivityResult(requestCode, resultCode, data)
    if (requestCode == REQUEST_CODE_ADD_DOCUMENT) {
        when (val result: OnboardingCommandResult =
            data!!.getParcelableExtra("onboardingCommandResult")) {
            is OnboardingCommandResult.Success -> {
                showDialog(result.response.content)
            }
            is OnboardingCommandResult.Failure -> {
                handleOnboardingError(result.response)
            }
            is OnboardingCommandResult.Cancel -> {
                showDialog("User has canceled the command")
            }
        }
    }
}
let documentId = "document identifier given by createDocument command"
let documentType = DocumentType.IDCARD;
let side = DocumentSide.BACK;
let issuingCountry = "ESP"

onboardingCommands.commandAddDocument(documentId, documentType, side, issuingCountry, (result) => { // onSuccess
    console.log(result)
} , (error) => { // onError
    console.log(error)
},  (cancel) => { // onCancel
    console.log(cancel)
})
Add document NFC
It presents an Alice Onboarding Document NFC Capture View that reads the
NFC chip locally and then sends the info to the Alice Onboarding
platform. Please note that the NFC functionality requires that the
document's MRZ has been previously scanned (Add document command)
self.onboardingCommands!.addDocumentNFC(documentId: documentId) { result in
    switch result {
    case .success:
        let message = "Successfully added document (\(documentId)) NFC to Alice Onboarding"
        print(message)
    case .failure(let error):
        print("Error adding the document (\(error))")
    case .cancel:
        print("User has cancelled the command")
    }
}
val userToken = "<ADD-YOUR-USER-TOKEN-HERE>" // Obtain it from the SandboxManager or your own Backend Server
val onboardingCommands = OnboardingCommands(this, userToken)
val REQUEST_CODE_DOCUMENT_NFC = 500 // Activity identifier
val documentId = "<ADD-YOUR-DOC-ID-HERE>"

onboardingCommands.addDocumentNFC(documentId, requestCode = REQUEST_CODE_DOCUMENT_NFC) {
{ result ->
       when(result){
           is DocumentNFCOnboardingCommandResult.Failure ->{
               showDialog(result.error.toString())
           }
        else -> {}
       }
}

. . .

override fun onActivityResult(requestCode: Int, resultCode: Int, data: Intent?) {
    super.onActivityResult(requestCode, resultCode, data)
    if (requestCode == REQUEST_CODE_DOCUMENT_NFC) {

        when(val result: DocumentNFCOnboardingCommandResult = data!!.getParcelableExtra("documentNFCCommandResult")) {
            is DocumentNFCOnboardingCommandResult.Success -> {
                showDialog("Added the document successfully to ALiCE Onboarding")
            }
            is DocumentNFCOnboardingCommandResult.Failure -> {
                showDialog("Error adding the document: " + result.response)
            }
            is DocumentNFCOnboardingCommandResult.Cancel -> {
                showDialog("User has canceled the command")
            }
        }
     }
}
let documentId = "document identifier given by createDocument command"
let onboardingCommands = new OnboardingCommands(this.userToken)
onboardingCommands.commandAddDocumentNFC(documentId, (result) => {
    console.log(result)
} , (error) => {
    console.log(error)
},  (cancel) => {
    console.log(cancel)
})
iOS Considerations
-
Add the following properties to your
info.plist<key>com.apple.developer.nfc.readersession.iso7816.select-identifiers</key> <array> <string>A0000002471001</string> </array> <key>NFCReaderUsageDescription</key> <string>We need access to the NFC to validate your identity</string>
-
Add the NFC Tag Reading capability to your app from XCode.
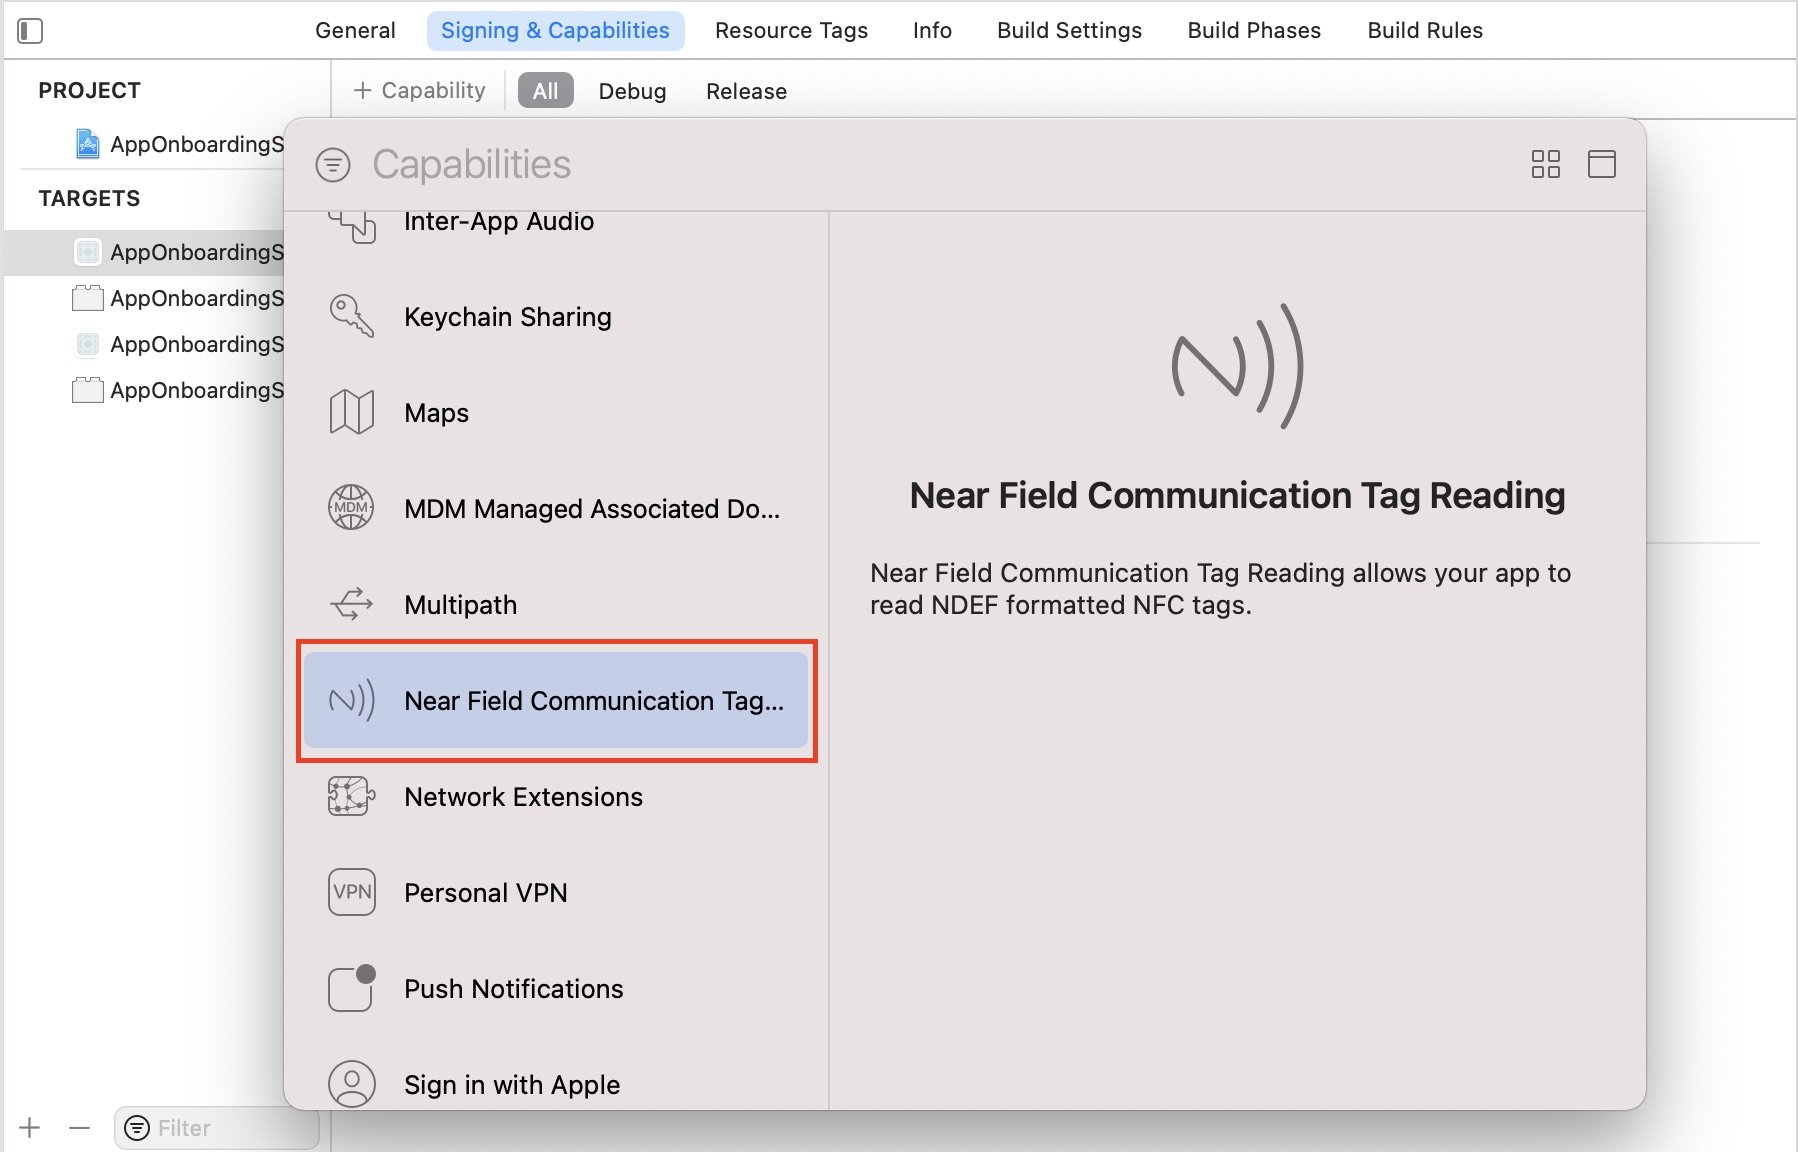
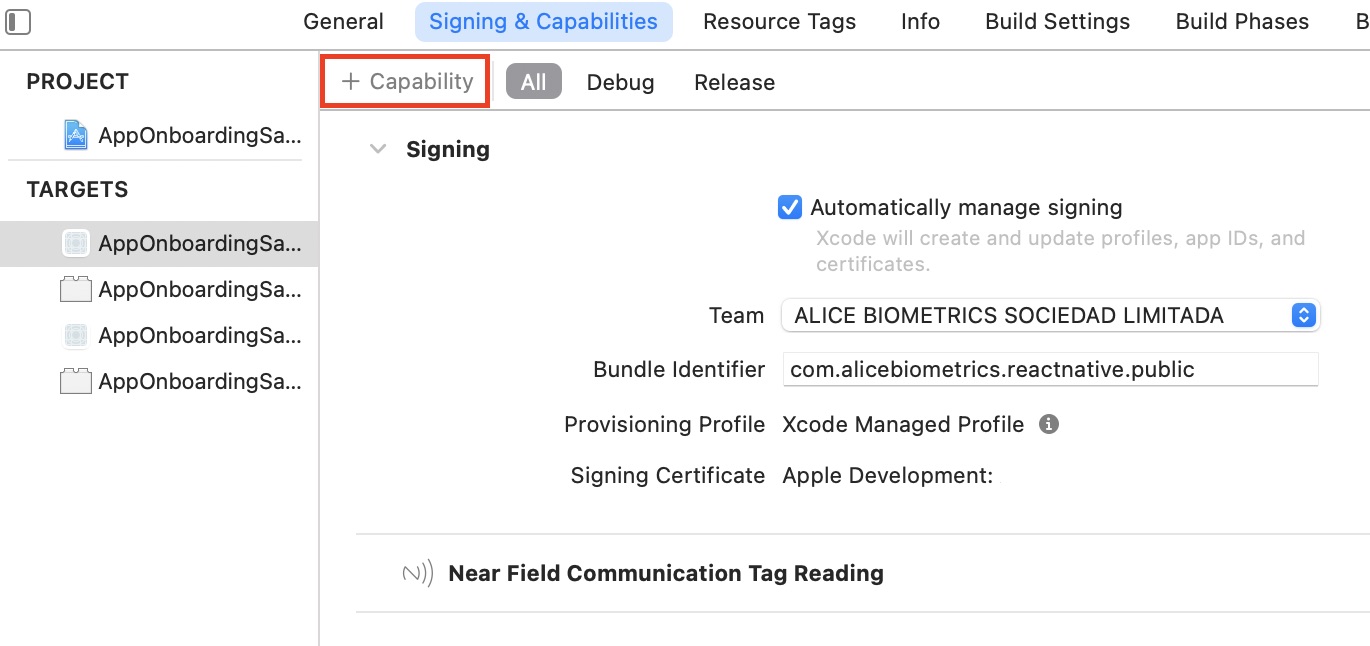
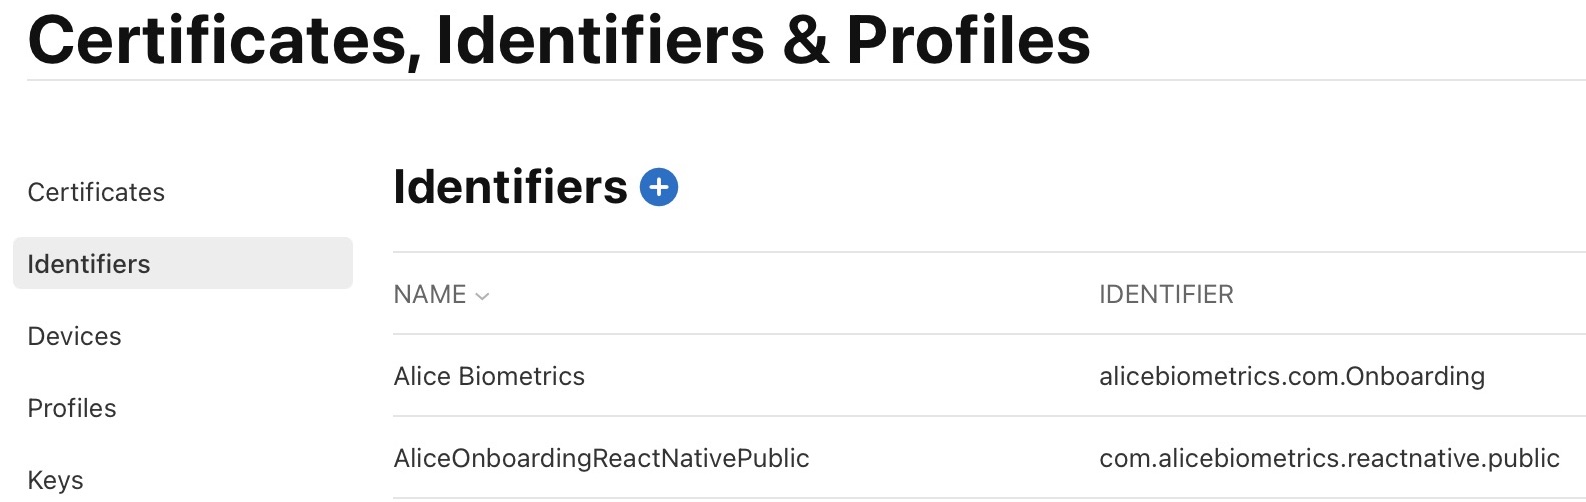
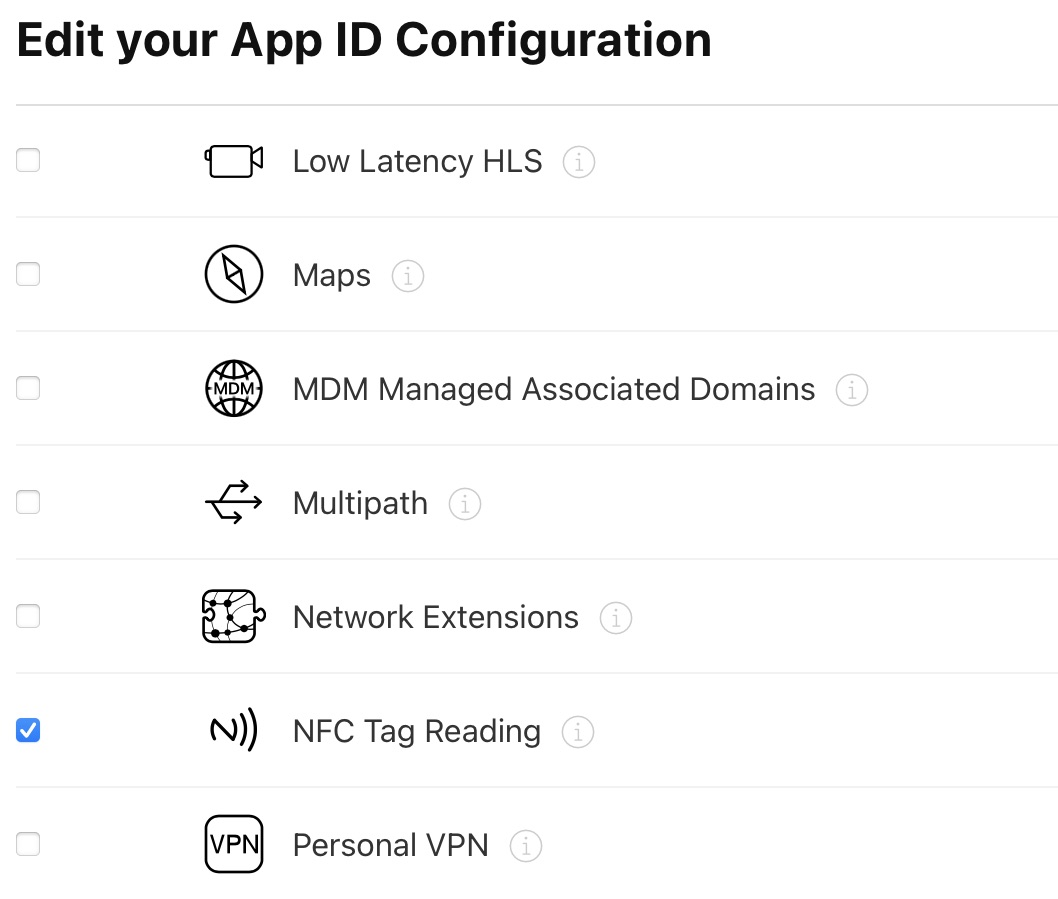
-
Allow NFC Tag Reading to your App ID configuration from your Apple Developer Account.
Add other trusted document
This functionality is an easy way to have a document that is not necessarily identification (e.g. proof of address, bill...).
There are two ways to use this feature:
- Uploading a file: It must be a PDF file and less than 10 MB in size.
- Capturing your document: You can add the sheets that are needed from your document. After each capture you can check if the image is correct and to finish you will press the send button that joins all the captures made and will generate a PDF.
addOtherTrustedDocument has one optional argument:
category: this argument is required if your flow requires multiple documents. You must use this argument to tag each document, for example if your flow requires an invoice and a payslip you could use "invoice" and "payslip" as categories.
let userToken = "<ADD-YOUR-USER-TOKEN-HERE>" // Obtain it from the SandboxManager or your own Backend Server
let onboardingCommands = OnboardingCommands(self, userToken: userToken)

onboardingCommands.addOtherTrustedDocument()
{ resultAddDocumentNFC in
   switch resultAddOtherTrustedDocument {
   case .success:
     let message =
     """
     Successfully added the other trusted document into Alice Onboarding"
     """
     print(message)
   case .failure(let error):
    print("Error adding the document (\(error))")
   case .cancel:
    print("User has cancelled the command")
 }
}
val userToken = "<ADD-YOUR-USER-TOKEN-HERE>" // Obtain it from the SandboxManager or your own Backend Server
val onboardingCommands = OnboardingCommands(this, userToken)
val REQUEST_CODE_OTHER_TRUSTED_DOCUMENTS = 500 // Activity identifier

onboardingCommands.addOtherTrustedDocument(
    requestCode = REQUEST_CODE_OTHER_TRUSTED_DOCUMENTS
)

. . .

override fun onActivityResult(requestCode: Int, resultCode: Int, data: Intent?) {
    super.onActivityResult(requestCode, resultCode, data)
    if (requestCode == REQUEST_CODE_OTHER_TRUSTED_DOCUMENTS) {
        val onboardingCommandResult: OnboardingCommandResult = data!!.getParcelableExtra("onboardingCommandResult")
        when(onboardingCommandResult) {
            is OnboardingCommandResult.Success -> {
                showDialog(result.content.toString())
            }
            is OnboardingCommandResult.Failure -> {
                Log.i(ONBOARDINGCOMMANDS,"Error: " + result.response)
            }
            is OnboardingCommandResult.Cancel -> {
                Log.i(ONBOARDINGCOMMANDS,"User has canceled the command")
            }
        }
    }
}
Not available yet
Get user status
It returns the Alice Onboarding User Status
onboardingCommands.getUserStatus { result in
    switch result {
        case .success(let onboardingResponse):
            print("UserStatus:\n \(onboardingResponse.content ?? "")"
        case .failure(let error):
            print("Error getting user status (\(error))")
        case .cancel:
            print("User has cancelled the command")
    }
}
onboardingCommands.getUserStatus { result ->
    when (result) {
        is OnboardingCommandResult.Success -> {
            showDialog(result.response.content)
        }
        is OnboardingCommandResult.Failure  -> {
            showDialog(result.response.toString())
        }
    }
}
onboardingCommands.commandGetDocumentsSupported( (result) => { //onSuccess
                console.log(result)
   } , (error) => {   //onError
                console.log(error)
 })
Authenticate
It authenticates (by face verification) an already enrolled and authorized user.
Presents a Alice Onboarding Authenticate Capture View, sending a video directly to Alice Onboarding platform as long as the user is authorized to do so.
Warning
Please make sure that the user is already enrolled and authorized.
onboardingCommands.authenticate { result in
    switch result {
    case .success(let onboardingResponse):
        let authenticationId = onboardingResponse.content ?? ""
        let message =
        """
        Authenticate on Alice Onboarding.
        Your backend have the response of your authentication
        (use authenticationId: (authenticationId))
        """
        print(message)
    case .failure(let error):
        print("Error authenticating ((error))")
    case .cancel:
        print("User has cancelled the command")
    }
}
val REQUEST_CODE_AUTHENTICATE = 200
onboardingCommands.authenticate(requestCode = REQUEST_CODE_AUTHENTICATE)

. . .

override fun onActivityResult(requestCode: Int, resultCode: Int, data: Intent?) {
    super.onActivityResult(requestCode, resultCode, data)
    if (requestCode == REQUEST_CODE_AUTHENTICATE) {
        when(val result: OnboardingCommandResult = data!!.getParcelableExtra("onboardingCommandResult")){
            is OnboardingCommandResult.Success -> {
                showDialog(result.response.content)
            }
            is OnboardingCommandResult.Failure -> {
                handleOnboardingError(result.response)
            }
            is OnboardingCommandResult.Cancel  -> {
                showDialog("User has canceled the command")
            }
        }
    }
}
onboardingCommands.commandAuthenticate( (result) => {   //onSuccess
                        console.log(result)
    } , (error) => {   //onError
                        console.log(error)
    },  (cancel) => {  //onCancel
                        console.log(cancel)
})
Tip
Take a look to a more detailed documentation and examples: iOS, Android and React-native.